pages

Saturday, September 10, 2011

Er... no makeup toes?


Ah, we finally come to the exception that confirms the rule! I love a beautiful pedicure and can’t imagine going the no makeup way on my toes. Depending on the time of the year and my mood, I pick from 3 different types of nail polish: brights, darks and neutrals.

Brights: when it’s hot outside my toes scream for brights. I love a dazzling red like Essie’s Lollipop. This type of highly pigmented colors requires a base coat and extra care upon removal (yep, go ahead and do a second round with a new cotton pad drenched in nail polish remover so that your cuticles regain their natural color…). While I love these colors they’re higher maintenance than I’d like so I tend to alternate with easier to apply and longer lasting neutrals.

Darks: so chic, so edgy, such great contrast! While I love a classic burgundy, these past months I’ve been drawn to dark browns and greys. My recent discovery and current favorite is Sally Hanson’s Tyin’ the Knot! The color is a shimmering warm pewter that goes with everything and lasts forever.

Neutrals: thought the above categories are great, neutrals remain my favorites. I love effortless metallics with a hint of shimmer that don’t require base or top coats, brush on evenly and look great with just one coat if I’m in a hurry. They also come clean with just one swipe of nail polish remover. Truly easy peasy!

3 neutral favorites:
Gold/bronzeSally Hansen Salon Complete Manicure in Gilty Pleasure. Beautiful, understated color that looks great with olive skin. Recurrently admired on my toes, I’ve started giving bottles of this polish away to family and friends.

Silver Milani Nail Lacquer in Ms. Milani. It is a gorgeous color described at the Milani website as “chromed silver gold”. If that doesn’t make you want to see it on your toes, check for a pulse. : ) It’s warm, flattering and easy to wear. It goes with both my gold sandals and my grey peep toes, and that’s a feat!

White – Borghese Nail Lacquer Vernis in Luna Pearl. I absolutely love this color but it’s apparently no longer available for sale (except on eBay, where you can find just about anything if you search carefully enough). I tried many pearly whites until I found the right one, with just enough warmth mixed in. It was the nail polish I wore on my toes at my wedding! A similar shade would be Essie’s Show Me The Ring (which I guess would have been even more appropriate at a wedding). I love how clean and distinguished it looks on my toes.
Friday, September 9, 2011

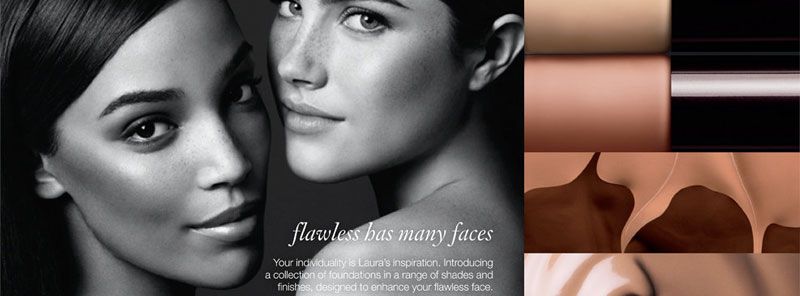
Makeup Artist crush: Laura Mercier


If I could have a makeup artist come to the house every morning and prep me for the day, it would be Laura Mercier. I know that I would leave the house looking just like myself, only a 100 times better! People would stop me in the street to comment on my fairy tale complexion! (you just got a glimpse into my weird fantasy life…)

A lot of makeup artists concentrate on delivering wow, being creative and modern. I respect how that would be great for a lot of people, for celebrities on the red carpet and just for fun on magazines. Laura Mercier has a different approach – she focuses on flawless skin and a natural effect. I hate to say something as cliché as this, but she is a quintessential French woman in that aspect, and understands that looking great is very different from looking made-up.

Naturally, her makeup line has that same goal of creating perfect skin and bringing out natural beauty. The large majority of her products are tools for creating beautiful skin – primers, foundations, creamy tinted moisturizers, powders, concealers that combine different colors and textures. I’ve recommended a few on this blog already, and I am sure to recommend at least a couple more. She has recently started a skincare line that I haven’t had the chance to test yet, but look forward to.

So pay her website a visit! Check out her Flawless Facephilosophy and her beautiful looks. Enjoy!


Wednesday, September 7, 2011

Tamed baby hairs


Maybe your hairline is super clean and there is an easy transition from forehead to normal hair. Maybe your baby hairs are the cute kind, where you pull your hair into a ponytail and have just a few even wisps. If you belong to the above categories, skip this post.

If you have ever struggled with your hairline, keep on reading!

In my case I have unruly baby hairs that stick out in every direction. They also commit a crime that the rest of my hair doesn’t dare! They… frizz. If it’s rainy or very humid, my baby hairs rebel and frizz, which makes me look (and feel) unpolished and a little frazzled. 

While hairlines are mostly unimportant, a frizzy hairline looks really messy even if you can’t single out what’s wrong. Correct it and it becomes unnoticeable again, like it was meant to be in the first place.

If you’ve ever tried to fight this problem with hair products, you’ve probably also found that it’s not easy to control. Hairspray on a toothbrush makes baby hairs stiff, while serum turns them greasy and slick. But there’s a fairly simple solution. Take the same product we used to tame unruly brows, the cheap clear mascara, and run the brush lightly through your baby hairs until they are coated and arranged in a nice way. Clear mascara dries quickly, stays put, adds no gloss or crunch, and does the job.

Tuesday, September 6, 2011

Perfecting skin – level 2


Skin is of supreme importance to the no makeup look. Like I discussed in the level 1 post of this series, our goals are to achieve a more even tone, less noticeable pores and a finish with a slight glow to it. In level 2 we’re looking for a little more coverage, which will help with the correction of any flaws. The type of product we will talk about is mineral makeup.

Much like millions of women, I am a fan of bareMinerals. When I first heard about it a few years ago I thought it was a marketing gimmick, just a new name for powder makeup, loose instead of pressed into a compact. Then I picked up a small amount of the stuff, rubbed between my fingers and was surprised by the almost creamy, silky texture. I remain a believer to this day.

You can visit their website to choose the right color for you. Stick with the original formula rather than the matte formula to better achieve the luminous finish.

Application is a cinch. Use one of their brushes – I prefer the Full Flawless Face brush – to pick up a small amount of product (less than a penny-sized amount of powder) that you’ve tapped onto the lid of the foundation pot. Swirl the brush around the lid to spread the powder evenly into the brush. Then use the brush to buff your skin using light round motions. There is really no way to go wrong with this technique. Start with just a little bit, take your time with buffing and add more if you feel it’s needed.

Skin looks perfected but entirely natural. Foundation does not settle into fine lines and the gentle buffing makes sure everything looks even. If your skin is oily, finish with hint of pressed or loose powder on your forehead, nose and chin. Two minutes and you’re done!

Sunday, September 4, 2011

Natural looking manicure

Nails are an important part of a polished look and very important to me. My dad cares very little about beauty and makeup but always told me it’s the one thing he always notices.  That said, I’m unwilling to spend hours taking care of them. I have written about how I like to buff them but there’s a couple more tricks to it. My goals for beautiful nails are: good shape, clean whites, healthy cuticles and a hint of shine.

Good shape – I like to see nails rather short, with the white edges under 1/10 of an inch (3mm or so for the metric system fans). Find a good proportion to the size of your nail, don’t try to compensate a short nail with an over elongated edge. While there are different nail trends every season – square! Claw shaped! Oval! Squoval! – I have come to realize that my favorite is the one that follows the natural shape of the nail, generally the same as the moon (the lighter semi circle at the base of your nail). Manicurists call it round, but it really depends on the shape of your nail.

File them while they’re dry so they’re less likely break. You don’t need to use those old fashioned grainy paper files that file huge bits at a time. Look for fine grain files at your drugstore and you’ll see that there is a bigger selection than you probably knew of, allowing for more precise filing and less errors.

Clean white edges – 2 words: nail brush. Ok, 1 additional word: regularly. : ) If you notice a little yellowing, you can also slice open a lemon and run your fingernails through the flesh. Keep them there a few minutes (or alternatively, soak them in fresh squeezed lemon juice) to naturally whiten them.

Healthy cuticles – this aspect contributes greatly to beautiful nails and is the hardest one to achieve. Try to keep your hands hydrated, rub a cuticle oil or cream often – I like Burt’s Bees Lemon Butter Cuticle Cream – and try wearing rubber gloves when doing chores around the house. Avoid cutting your cuticles and try to push them with an orange wood stick or your nails after a shower or bath. Cut only the ones that are sticking out on the sides. I find that leaving my cuticles alone is the best way to keep them healthy and looking neat.

Hint of shine – this brings us back to the buffing post I shared earlier.

Enjoy your beautiful and carefree manicure!

Friday, September 2, 2011

Exfoliating your way to better skin


If beautiful skin is at the heart of the no makeup look, then a great skincare routine needs to be part of it too. I’m sure there will be plenty of posts about skincare in my future. I just love the stuff – pretty bottles, amazing promises, great textures and scents… There’s only one problem: for most products it takes time and patience to see results. I like to say that I have many great qualities. Patience just doesn’t seem to be one of them!

So if you want results and you want them right now, you’re going to love exfoliation! This refers to all the types of products out there that get rid of the dead cells on the outermost layer of skin to give you a brighter and smoother complexion after just one use! Exfoliation can be mechanical – where you use grainy textures, loofahs or any other kind of abrasive – or chemical – where you let fruit enzymes  or acids such as salicylic acid or do the job for you. Both can be gentle or harsh so take the time to find what's right for you. Here are a few of my favorite things!

St. Ives Fresh Skin Invigorating Apricot Scrub – this is a US favorite and best seller. It comes in a decent sized tube or pot, it’s cheap and it does the job. Since it’s a little harsh on the skin (walnut shell is pretty rough) I use it mostly on my chest and back.

Clinique 7 Day Scrub Cream – another award-winning favorite! This one is much gentler thanks to its tiny micro-beads and creamy base. Clinique states that you can wear it every day but I recommend that you space it out to whatever makes sense to you (3x a week worked great for me).

Clarisonic Mia Brush – if there is such a thing as love at first scrub, this would probably be it. It’s incredibly gentle and recommended for all types of skin (even people with rosacea) but it’s very effective and pleasurable to use. Clarisonic states that “Mia cleanses so well that products absorb better, pores appear smaller, and fine lines and wrinkles appear reduced.” Use it with a gentle cleanser like Cetaphil and see your skin get better looking every day. Since it’s not that cheap consider it… an investment! “You’re worth it” and all of that! You can get a demo at Sephora and see what all the hype is about.

These were all different types of mechanical exfoliants. Let’s finish up with a chemical one for a little diversity!

Origins Brighter By Nature Brightening Peel with Fruit Acids – these pads are super easy to use. Just take one out of the pot, run it over your face until you’ve hit all the areas and you’re done! Follow with some moisturizer and be sure to wear SPF during the day. Not only will your face be smooth and clear, you should also see some improvement in your sun spots. Win win!

The important thing to remember about exfoliation is not to overdo it. I don’t currently wear all of these, but have had great results with them in the past. Try one of these for your face and see how it behaves before adding anything else. Start by doing it one or two times a week and increase as needed. Also, discuss what’s best for your skin with your dermatologist – they really do know best!

Thursday, September 1, 2011

Eyeliner pencil – intensity 2

For this second eyeliner post (see the first one here) we will focus on more definition and a hint of smokiness. Since we are going for a natural effect, I recommend using colors such as brown, grey or black. This application technique is one of the most traditional for eyeliner and is appropriate for most occasions. My favorite product ever, Lancôme’s Le Crayon Khol in Brun (or Black Coffee), is once again the recommended product.

Make sure that your eye pencil is reasonable sharp, pull at the outer corner of the eye to make eyelid taut and carefully draw a fine line from the inner to the outer corner, as close to the eyelashes as possible. Since this is not liquid eyeliner, you don’t have to do it all in one line and can go bit by bit until you’ve lined the whole upper lid.

Don't worry about getting it just perfect because we are about to smudge it. When you’re done drawing the line, run a fingertip over it until the edges are gone. Go sideways rather than up and down, so the eyeliner stays concentrated at the lash line. You can use a q-tip for more control and to clean up any smudges that have strayed too far.

You should have a smoky lash line right now with no hard edges. For extra credit, take your eyeliner and draw a very fine line right at the base of your lashes. Don’t smudge this last line, which should blend beautifully into your slightly wider smudged eyeliner. Add two coats of lengthening mascara and go show off your gorgeous eyes!